What materials are best for outdoor kitchens in Texas?
Stainless steel, natural stone, and sealed concrete are the three materials that survive Texas weather year after year. Stainless steel resists corrosion in our 70-80% humidity, granite and quartzite handle 100°F+ surface temperatures without cracking, and properly sealed concrete won't spall during our occasional freeze events.
When you're building an outdoor kitchen in Katy, material choice determines whether you're maintaining it or enjoying it. We use 304-grade stainless steel for all appliances and hardware—it's the commercial kitchen standard because it won't rust out in three years like cheaper alternatives. For countertops, granite runs cooler than quartz in direct sun and costs $40-60 per square foot installed.
The base structure matters just as much. We build with cement board backing and stone veneer or brick facing because both materials breathe—they release moisture instead of trapping it behind your cabinets. According to the Texas A&M AgriLife Extension, proper material selection can extend outdoor structure lifespan by 10-15 years compared to indoor-rated materials used outside.
At Patio Cover Katy, we source materials rated for coastal environments even though we're inland—if it survives Galveston salt air, it'll handle anything Katy throws at it. Check out our outdoor kitchens page to see material comparisons from actual projects.
How can I create a functional grilling area in my outdoor kitchen?
A functional grilling area needs 24-30 inches of prep space on each side of the grill, a landing zone rated for 400°F pans, and everything within a 4-foot reach. This layout mirrors professional kitchens because it eliminates the back-and-forth that burns food and frustrates cooks.
Start with your grill selection—size it for your actual cooking, not your imagination. A 36-inch grill handles 20-25 burgers at once, which covers most backyard gatherings. Position it as one point of your work triangle, with your prep counter and sink forming the other two points. Each leg of that triangle should measure between 4 and 9 feet.
Install your prep counter at 36 inches high (standard kitchen height) and use a material that won't stain from marinade spills. We typically run a 6-foot granite or concrete counter with an integrated cutting board section. Add an outdoor-rated electrical outlet every 4 feet for blenders, electric knives, and phone chargers—you'll use them more than you expect.
The sink makes the difference between a cooking station and a true outdoor kitchen. At Patio Cover Katy, we install undermount stainless sinks with hot and cold lines because washing your hands or rinsing vegetables in cold-only water gets old fast. We've designed over 200 grilling stations across Katy, and the ones that get used most follow this exact formula. Browse our gallery to see working layouts from completed projects.
What seating options are ideal for outdoor kitchens?
Counter-height bar seating at 24-30 inches deep with weather-resistant cushions creates the most-used gathering spot in any outdoor kitchen. Add a separate dining table 8-10 feet away for plated meals, using materials rated for 90+ mph winds—the threshold for severe Texas thunderstorms.
Bar stools along your kitchen counter keep guests engaged with the cook instead of isolating them at a distant table. We install 42-inch high counters with 12-inch overhangs that fit standard 30-inch bar stools. Space them 24-26 inches apart (center to center) so people aren't bumping elbows. Look for aluminum frames with Sunbrella fabric—both materials handle our weather and last 7-10 years before needing replacement.
For dining, a 72-inch table seats six comfortably and eight in a pinch. Stone, powder-coated aluminum, and marine-grade polymer all work, but skip glass tops—they turn into magnifying glasses under the Texas sun and create hot spots. Position your dining area under shade, whether that's a pergola, covered patio, or large umbrella rated for wind.
According to Patio Cover Katy, the sweet spot for total seating is 1.5x your typical guest count. If you regularly host 8 people, plan for 12 seats split between bar and dining areas. This prevents the crowded feeling that pushes people back indoors. See how we've arranged seating in different yard sizes on our Cinco Ranch project page.
How do lighting solutions enhance outdoor kitchens?
Proper outdoor kitchen lighting delivers 75-100 lumens per square foot over work surfaces for safe knife work and accurate meat temperatures, while 10-20 lumens per square foot in dining areas creates comfortable ambiance without the harsh glare that kills conversation.
Task lighting comes first. We install LED strip lights under overhead structures directly above grills and prep counters, giving you shadowless illumination that shows you what you're actually doing. Pendant lights work too, but mount them 30-36 inches above the counter so they're not in your face. Use 3000K color temperature bulbs—they render food colors accurately so you know when your steaks hit medium-rare.
Layer in ambient lighting 8-12 feet overhead using string lights, lanterns, or recessed cans in your patio cover. This secondary layer extends your usable hours past sunset without the operating-room feel of overlighting. We wire everything on separate switches so you control task and ambient independently—full brightness while cooking, dimmed down for after-dinner drinks.
Add accent lighting along pathways and steps because liability matters and twisted ankles end parties fast. Small bollard lights every 6-8 feet mark edges clearly. At Patio Cover Katy, we run all outdoor lighting through GFCI-protected circuits and use IP65-rated fixtures minimum—anything less invites water damage. Our patio cover designs integrate lighting infrastructure from the start so you're not retrofitting later.
What appliances should I include in my outdoor kitchen?
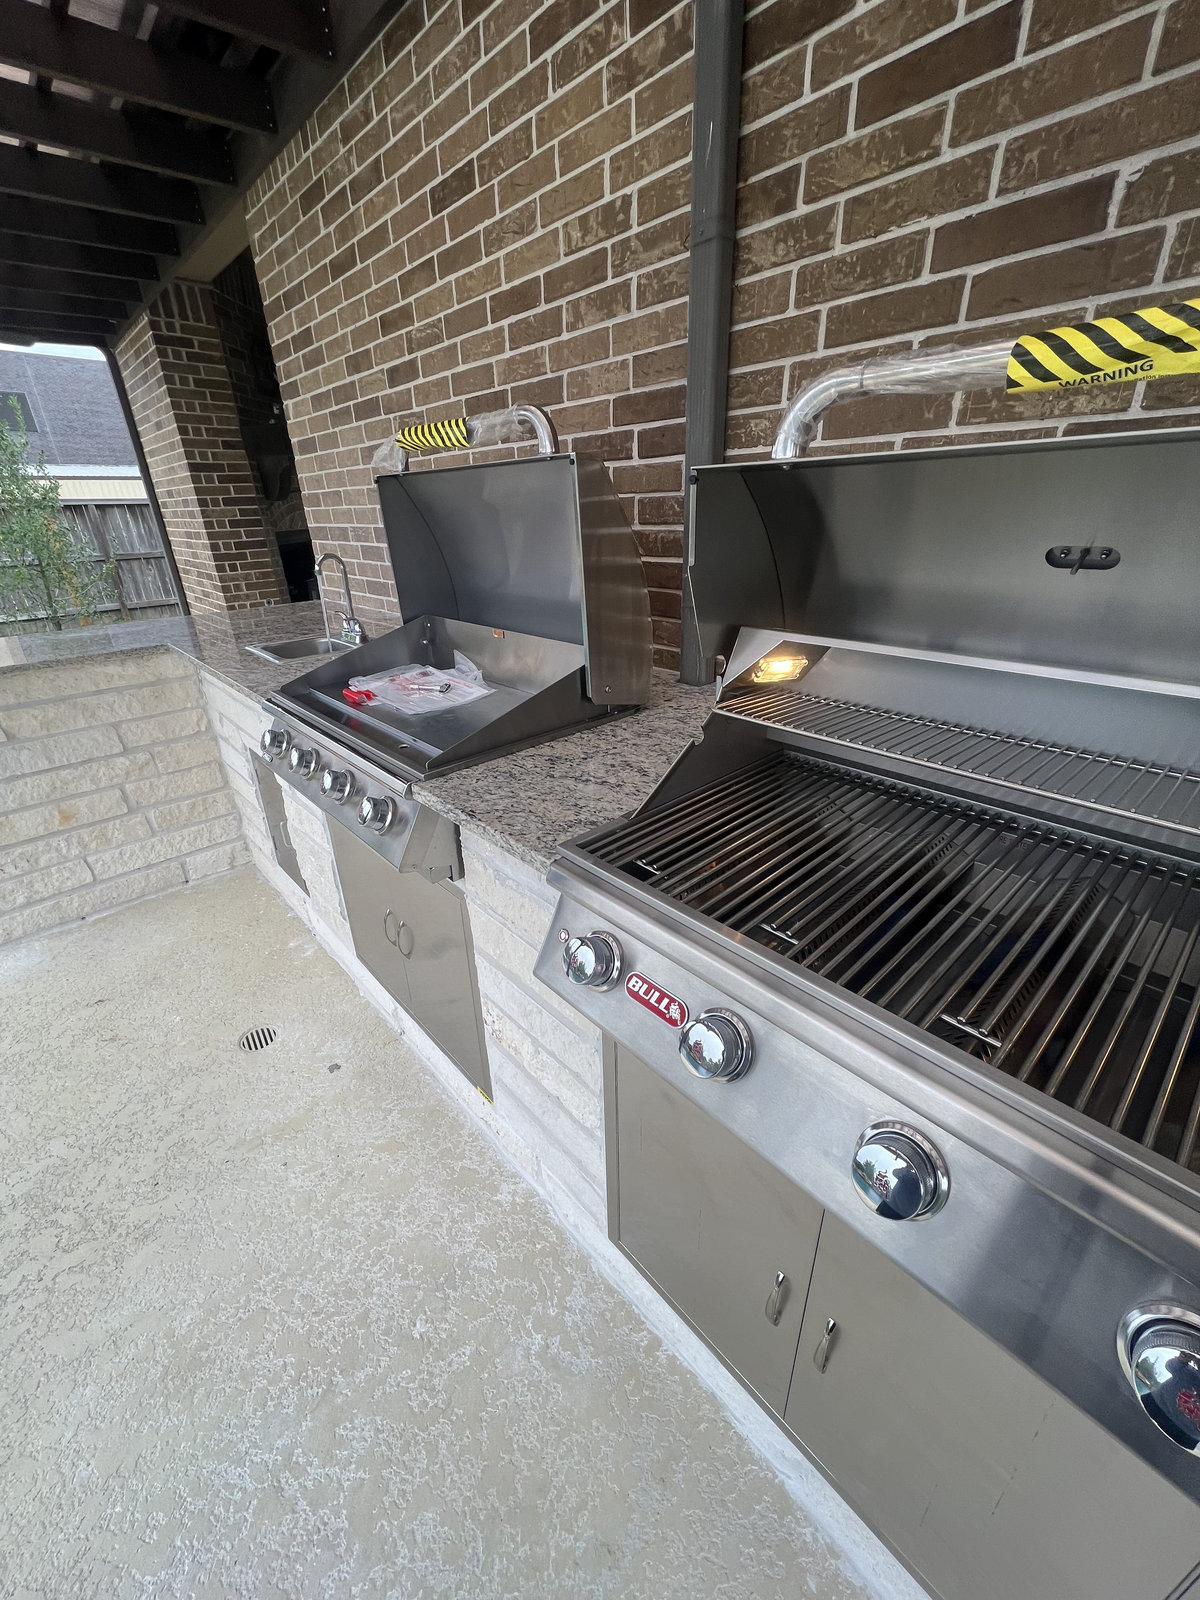
Essential outdoor kitchen appliances include a BTU-rated grill (40,000+ BTU for proper searing), a refrigerator designed for 100°F+ ambient temperatures, a sink with both hot and cold water lines, and weatherproof storage cabinets with marine-grade hinges.
Your grill anchors everything—invest here first. A quality 36-inch grill with 50,000-60,000 BTUs across four burners handles everything from low-and-slow brisket to high-heat pizzas. Built-in models look cleaner and free up your counter, but they need proper ventilation clearances: 6 inches on sides, 10 inches on back.
Outdoor refrigerators aren't optional in Texas—they're essential. Standard indoor fridges fail when outdoor temperatures hit 95°F because they're not designed to work that hard. Look for units rated to 110°F ambient with forced-air ventilation. A 24-inch undercounter model (5.0-5.5 cubic feet) holds enough drinks and perishables for most gatherings and costs $800-1,500.
Add a sink with a 4-gallon-per-minute flow rate for quick pot filling and cleanup. We plumb them with PEX lines run through conduit because exposed copper corrodes in our climate. Storage cabinets need stainless steel or polymer construction—wood cabinets warp within two years even with sealant. According to the National Association of Home Builders, outdoor kitchens with these core appliances add 100-200% ROI at resale.
At Patio Cover Katy, we help you right-size appliances for your actual cooking style instead of overselling equipment you won't use. Our outdoor kitchen installations focus on the appliances that get used weekly, not the ones that look impressive but sit idle.
How can I integrate shade into my outdoor kitchen design?
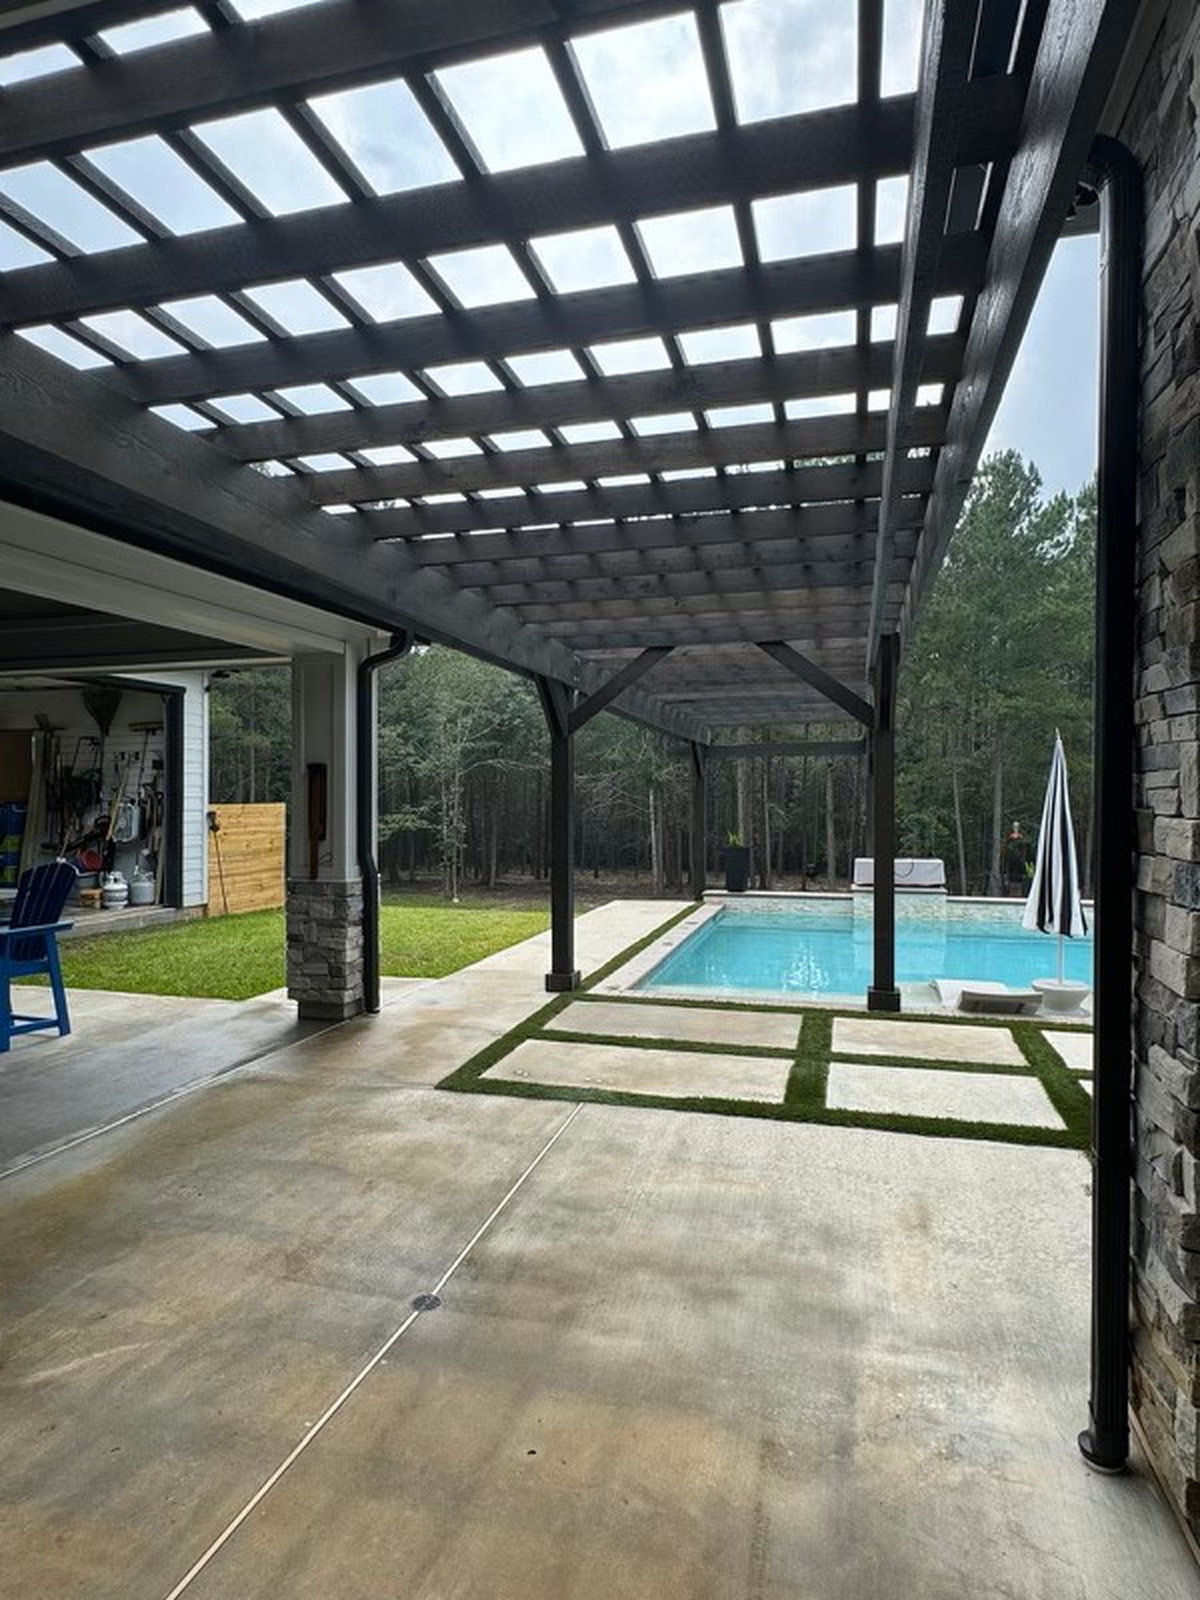
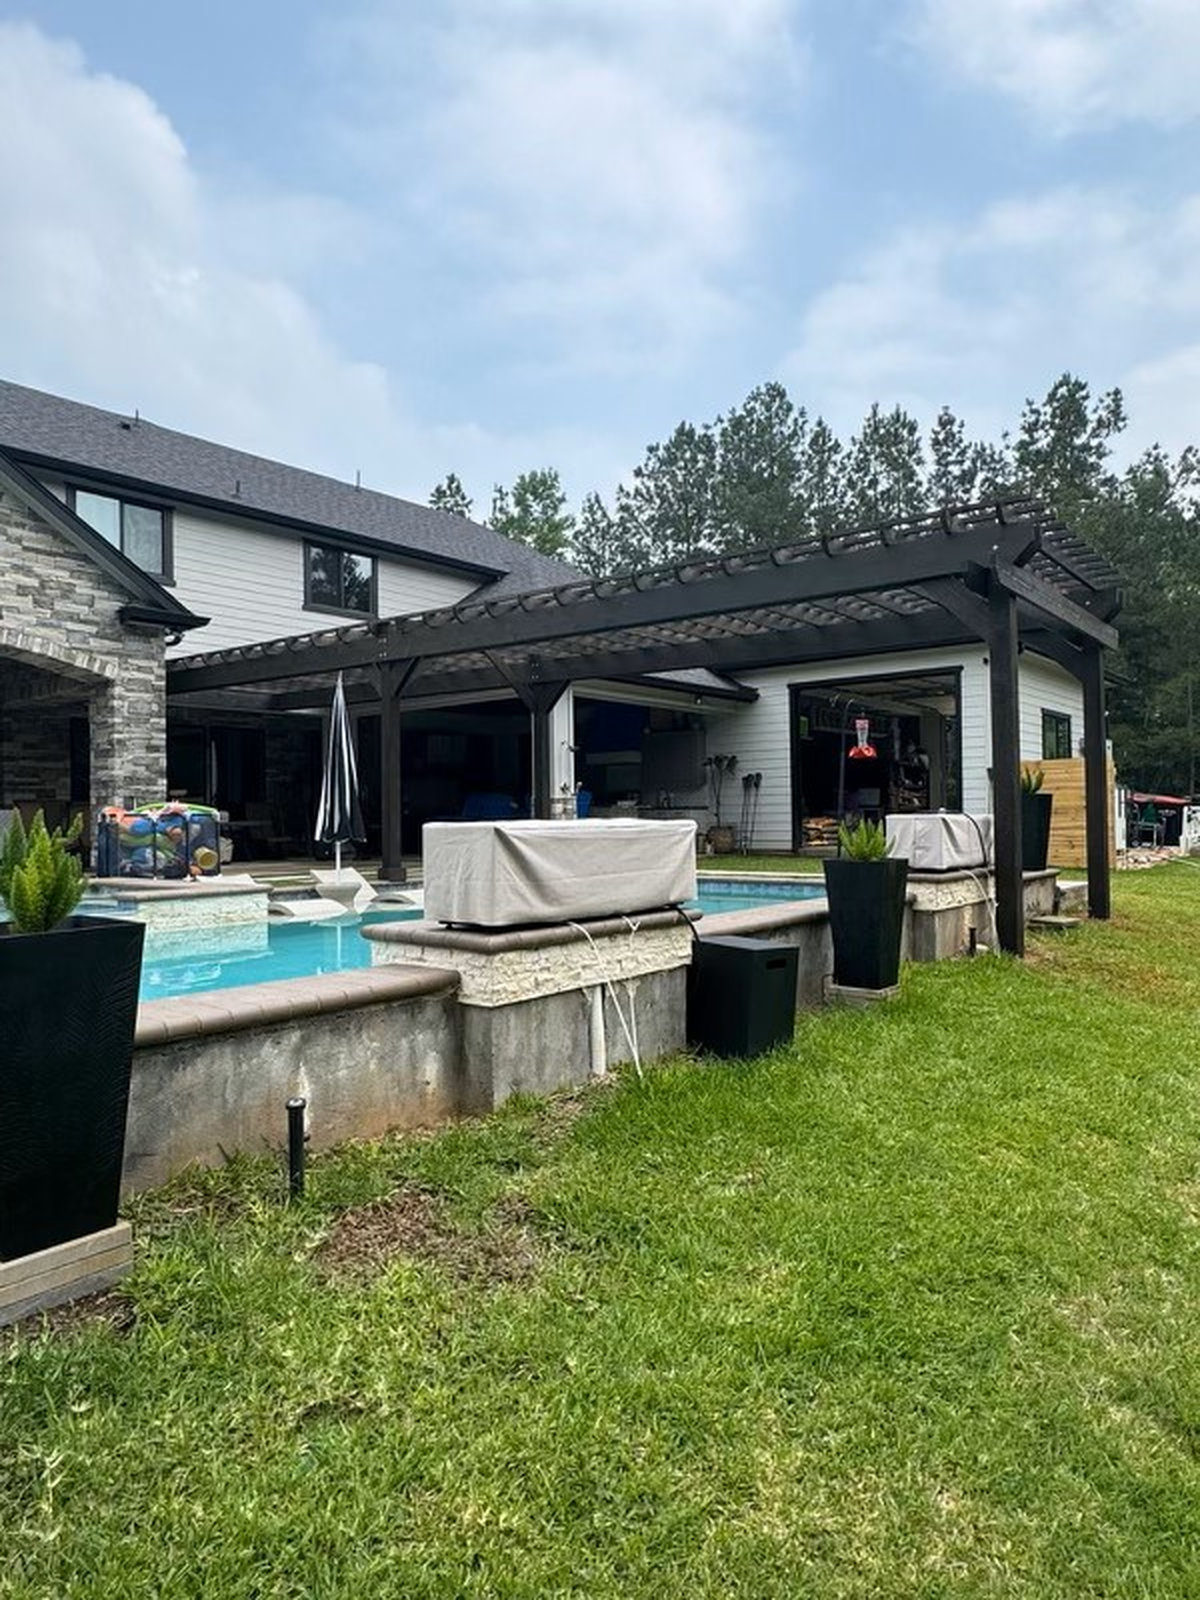
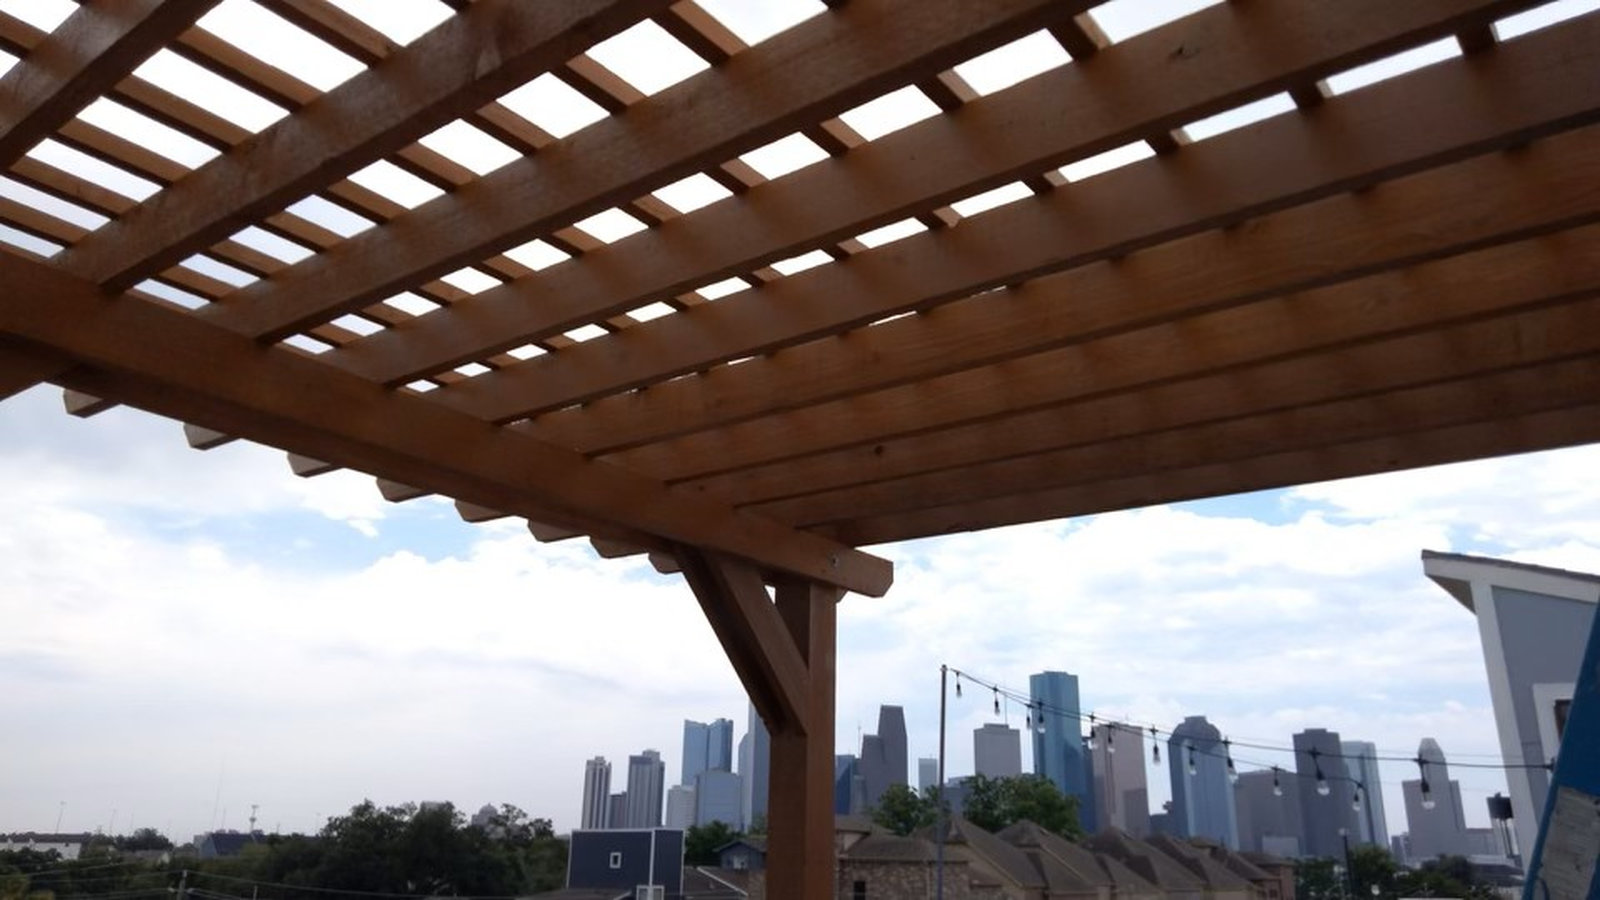
Overhead shade structures reduce outdoor cooking temperatures by 15-20°F and protect your investment from UV degradation that cracks countertops and fades cabinetry. Attached patio covers, freestanding pergolas, and retractable awnings all work if they're engineered for 90+ mph wind loads.
Patio covers deliver the most coverage per dollar—a 12x16 foot insulated roof runs $4,000-7,000 installed and blocks 100% of direct sun. We build them 9-10 feet tall at the low end so heat rises away instead of pooling around your head. Insulated panels outperform open beams by keeping the space 8-10 degrees cooler because they block radiant heat transfer.
Pergolas cost less ($2,500-5,000 for similar dimensions) but only reduce temperatures by 10-12 degrees since they're partially open. They work well when you add retractable shade cloth that you can adjust seasonally. Mount the structure posts outside your main work triangle so they don't interrupt traffic flow between grill, sink, and prep areas.
For flexibility, motorized awnings extend 10-14 feet and retract when you want full sun or need to protect them from incoming storms. Quality units with wind sensors run $3,000-6,000 but they're worth it if your outdoor kitchen faces west and catches afternoon sun. At Patio Cover Katy, we engineer all shade structures to Texas building codes for 130 mph wind resistance—our engineering guide breaks down why proper load calculations matter. We've installed hundreds of covered outdoor kitchens across Fulshear, Sugar Land, and throughout West Houston.
What lighting options work best for outdoor kitchens?
The most effective outdoor kitchen lighting combines overhead LED task lights delivering 75-100 lumens per square foot, dimmable ambient fixtures at 15-25 lumens per square foot, and low-voltage pathway lighting rated for wet locations. This three-layer approach handles cooking safety, atmosphere, and navigation.
LED strip lights mounted under your patio cover or pergola beams work better than pendant fixtures because they eliminate shadows across your entire prep surface. We install them 8-10 feet overhead in weatherproof channels, using 3000K color temperature so food looks natural, not institutional. These draw 12-18 watts per foot and last 30,000+ hours—roughly 10 years of nightly use.
For ambient lighting, Edison-style string lights add warmth without glare. Hang them 9-10 feet high in parallel runs spaced 3-4 feet apart. Pair them with a dimmer switch so you can dial down intensity after cooking when conversation takes over. Add accent lights inside cabinets and behind backsplashes—these subtle touches make the space feel finished instead of utilitarian.
Pathway lights prevent trips and falls when guests move between your outdoor kitchen and the house. Space them every 6-8 feet along walkways, using fixtures mounted 14-18 inches high. We wire everything through GFCI breakers and use IP65-rated (weatherproof) fixtures throughout because exposed connections fail within 18-24 months in Texas humidity. The lighting plans we include with our custom patio covers in Katy address all three layers from the start.
How do I choose the right layout for my outdoor kitchen?
The right outdoor kitchen layout creates a work triangle where your grill, sink, and refrigerator sit 4-9 feet apart, with the grill positioned to keep smoke away from seating areas based on your property's prevailing wind direction. L-shaped and U-shaped configurations deliver this efficiency in spaces 10x12 feet or larger.
Start by mapping your prevailing winds—in Katy, that's typically southeast during summer. Position your grill so smoke blows away from both your seating area and your neighbor's yard. Place it on one leg of an L or at the center of a U, then build your prep zones around it. Your sink goes on one side (24-30 inches away), your refrigerator or storage on the other, creating that kitchen triangle professional chefs rely on.
L-shaped layouts work in 10x14 foot spaces and fit against most home exteriors. One leg runs 8-10 feet along your house with the grill and prep area, the other extends 6-8 feet perpendicular with your sink and storage. This leaves your fourth side open for traffic flow and doesn't box you into a corner.
U-shaped designs need 12x16 feet minimum but let you face your guests while cooking. The grill centers the base of the U, flanked by prep counters, with the two arms extending forward to form a natural bar area. This layout handles larger gatherings because it creates distinct zones for cooking, serving, and socializing. At Patio Cover Katy, we've learned that the best layouts also factor in your home's door locations—you don't want to carry groceries through your work triangle. We draft layouts specific to your yard's dimensions and how you actually move through the space, just like we did on this Richmond patio project.
Pro Tip: Pro Tip from Patio Cover Katy: Before you finalize your layout, cook a test meal using your current outdoor setup with cardboard boxes marking your planned grill, sink, and counter positions. You'll discover traffic patterns and reach issues in 30 minutes that aren't obvious on paper—and moving cardboard beats relocating gas lines later.